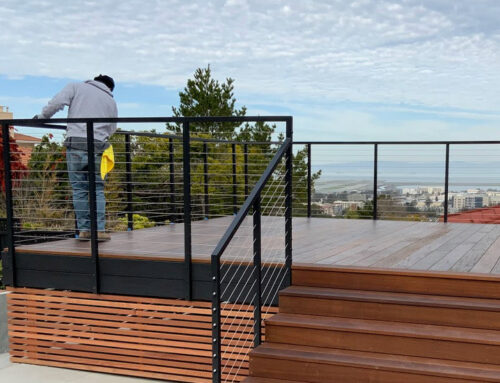
Ensuring your cable railings maintain their tension is important. Not only does it keep the posts straight and sturdy, but it also helps protect you and your visitors from falling off a porch or deck.
Tightening your cable railings can be an easy DIY project, though cable railings installed by Los Angeles Cable Railing are installed properly the first time and rarely need to be tightened over time which saves you time and effort.
Problems You May Have
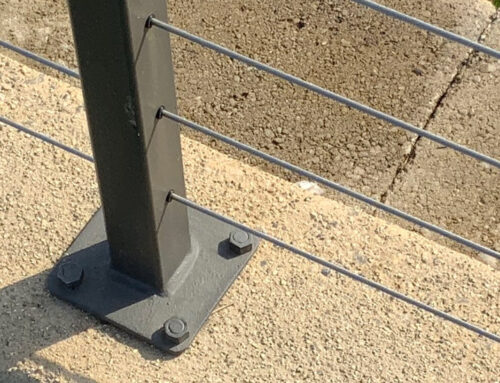
Tension that is too high can lead to bowing of your posts and upper railings. This excess force being constantly applied to the corner posts can loosen them over time, especially as changes in temperatures cause a natural expansion and contraction of the different materials.
If you notice posts bending, tilting, or bowing, your cable tension may be too high and will need to be loosened in order to prevent further damage to the railing system.
Tension that is too low will be seen in slightly sagging cables. Not only does this look unsightly, but it will also not provide the same amount of safety you would expect from a quality railing system in the first place.
If a 4 inch diameter ball can pass between the railings, they are too loose and will need to be tightened. Tightening the cables can be done at the different connection points, but will need to be tensioned to a specific amount so you don’t end up with bowing or bending posts.
Inspecting the Tension
Most building codes require the tension of cable railings to support up to 200 pounds. This ensures the cables will maintain a specific width between them. Inspecting the cable tension will require the use of various tension gauges any cable railing installer will have on hand.
If you suspect your cable railing may not have the right tension, give your local cable railing installer a call for an inspection. This is a very simple process that can give you the peace of mind needed when it comes to the safety of your railings.
Adjusting the Tension Yourself
Some cable railing systems can be tightened yourself, though if you need to meet specific tension levels to meet building codes, it would be much better to contact a cable railing installer for a tension adjustment.
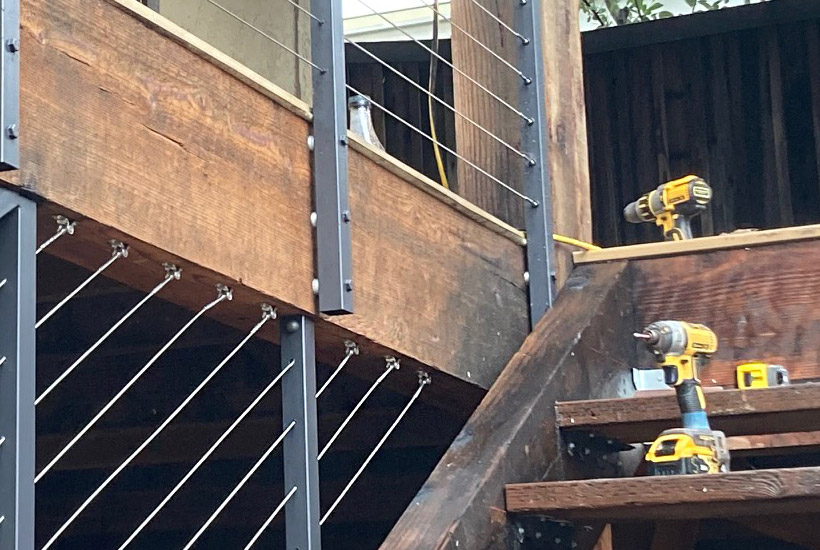
For the DIY project, you will need a variety of tools including a wrench, cable railing hardware kit, gloves, and lubricant. Your first step will be to locate your cable railing hardware that holds the cables in place. These are normally on each post, but normally start at the corner posts.
Use your wrench to loosen the hardware in order to allow some give in the cables. This will let you adjust the tension to be tighter or more loose, but is much easier to do when all cables are loosened at the start of the process. Once your desired tension has been reached, ensure you re-tighten each hardware connector thoroughly.